

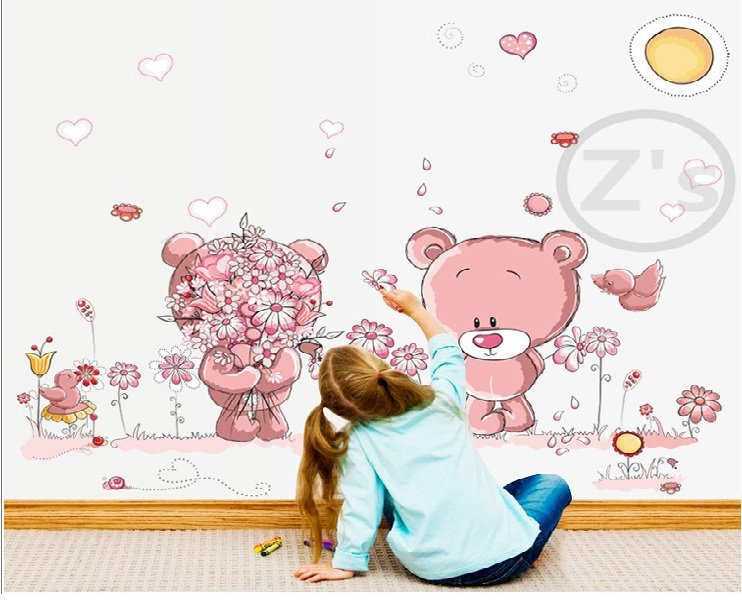
Congrats if you just purchased a wall sticker or you’re considering getting one for your home or office. Wall stickers have become a modern and classy way to enhance the look of our homes. It has also become an affordable alternative to painting.
Vinyl wall stickers are made from a non-toxic plastic material and it’s durable and easy to apply. The Vinyl wall sticker is the most popular owing to its unique quality and ease of application.
There are also Mural wall stickers which differs considerably in texture and quality. I will share how to stick or install your vinyl wall sticker if you just purchased one or are still considering.
Inspect walls for smoothness and dryness

No matter how beautiful and expensive your wall sticker is, its method of application and final destination (Wall) should be thought true considerably. Inspect the walls for cracks. It’s very important to clean the surface of the wall with a damp cloth and allow about 15 mins to dry out.
This will help wipe off sandy particles. For obvious contours on the wall that needs filing out, you can use a scrapping tool to scrap out contours. However, try to avoid scrapping off the paint on your wall in the process so do this mildly and carefully.
For a better result, try avoiding surfaces painted with Tex-cote paint because of the overall rough surface which is not ideal for wall stickers.
Take measurement of the wall and sticker to get proper alignment

To make your vinyl wall stickers look great and professional, you need to align it properly on the wall to avoid it being too close to the right or vice-versa. To get a good result, take the following steps:
Step 1: With a tape, measure the width most importantly (Inch or cm) of the wall.
Step 2: Measure wall sticker length and width.
Step 3: Deduct the width of the wall from the width of the sticker.
Step 4: Divide the result by two.
Step 5: With a pencil, measure and mark the wall with the result in step 4 at both extreme ends of the wall.
Step 6: Stick your wall sticker in between the markings to get a centre aligned look.
Example: Width of wall in consideration = 150 cm
Width of wall sticker = 90 cm
Deduct: 150 – 90 = 60 cm
Divide: 60/2 = 30 cm
Measure and mark 30 m each from both ends of the wall and set the sticker at the centre.
Peel off white sticky backing
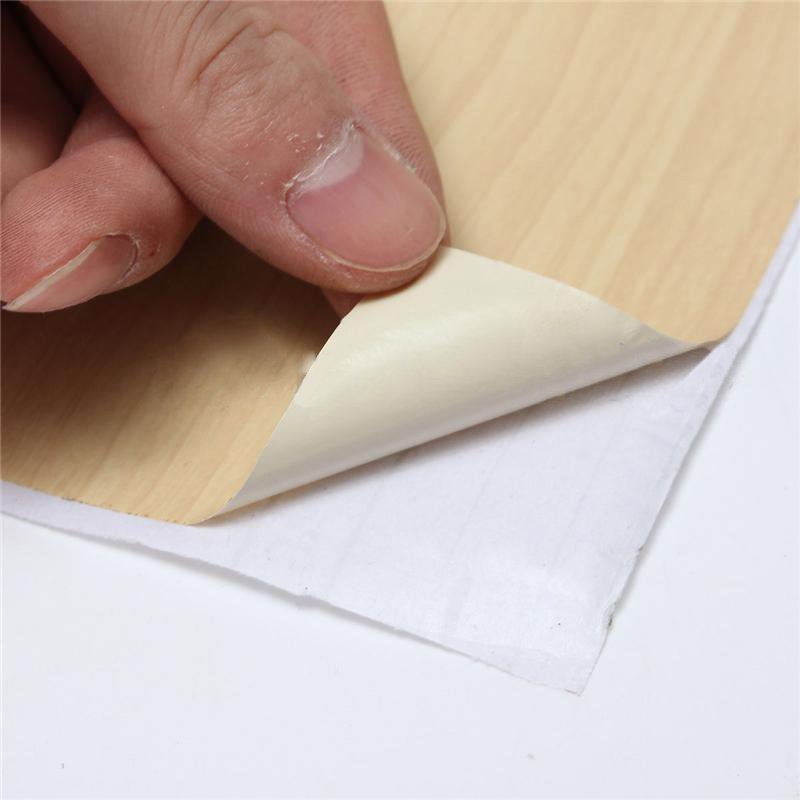
At this point, you need a little patience to get this right, but don’t fret.
Place the wall sticker on a table and peel gradually from the white edge of the sticker and rip it off gently from one side to the other. If you get stuck halfway, replace the white backing and start again.
Try to avoid exposing the sticky part to air for so long so it doesn’t lose its stickiness. Once you’ve done this you can stick on your wall or the surface you’ve marked out.
Stick to wall surface and allow a few minutes to stick
After peeling off and sticking to the wall, gently apply pressure from the top to the bottom to ensure it sticks. Then give it a few minutes to stick before you take the final step.
Peel the transparent film off gradually in front
Wall stickers usually comes with a protective transparent or translucent film. When your wall sticker sticks, from the top right edge and with the tip of your finger, pull over the transparent film to release the actual wall sticker beautifully on your wall.
I hope you found these tips helpful, if you’ve installed yours, you can Email Us! your new wall sticker.


